 I was one of those who ordered the Raspberry Pi 2, when it was announced back in February 2015, off the back of the claims that it would run Windows 10. Not the full desktop version of Windows 10 of course, but a version for simpler devices. Still, it impressed me that here was a $36 computer that could run the latest version of Microsoft Windows.
Unfortunately, while the Pi 2 became available back then, the required version of Windows was not. It’s only been in the last month that Microsoft launched Windows 10 IoT Core, so I’ve finally had a chance to try it out.
For those that also are interested in this option, I thought I’d note down my experiences on installing it, connecting to it and running software on it.
Installing Windows 10 IoT Core
There are some official instructions provided by Microsoft on how to do this. However, they require that you are running Windows 10 on a PC, and none of my computers have Windows 10 yet. I also didn’t want to use up the hard disk space that would be needed if I had set up a Windows 10 virtual machine. I was more interested in unofficial options.
What didn’t work:
- Using the Python ffu2img tool to convert the official Windows 10 IoT SD card image to something that could be loaded onto the SD card with something like Win32 Disk Imager. The ffu2img developer admits that they are pretty sure that there’s something wrong.
- Downloading the official Windows 10 Home edition ISO and using the version of DISM in the sources directory there to load the SD card image.
What did work:
- I got the official Windows 10 IoT Core for Raspberry Pi 2 ISO from Microsoft, opened it, ran the installer, and it put the flash.ffu file in
C:\Program Files (x86)\Microsoft IoT\FFU\RaspberryPi2\ - Next, I got the Windows ADK for Windows 10 installer from Microsoft, and it loaded a suitable version of DISM into
C:\Program Files (x86)\Windows Kits\10\Assessment and Deployment Kit\Deployment Tools\x86\DISM\ - Then I formatted my SD card using SD Formatter
- I copied the flash.ffu file into the DISM directory and used it (following the instructions on the Raspberry Pi forums) in an Administrator Command Prompt to copy it onto my SD card
- I safely ejected the SD card, and popped into the Pi and it booted up fine.
Connecting to Windows 10 IoT Core
Once the Pi got going, I needed to tell it what language to use. I had plugged a decent quality USB keyboard in, but it was extremely finnicky: key presses were seemingly ignored. In the end, I plugged a USB mouse in and it was much more responsive to mouse clicks.
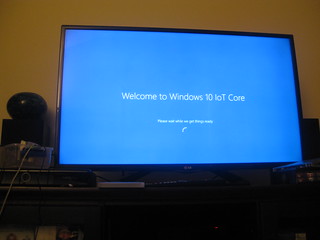
Windows 10 IoT is really designed to run a single GUI application. It boots into one that shows the hostname and IP address for the Pi, as well as displaying some simple tutorial instructions. It’s designed to connect to Visual Studio 2015, and allow a developer to push their application straight to the Pi. However, I don’t work with my Pi that way – I connect into it and configure/run it via a remote shell.
It’s possible to SSH straight into the Pi (as user Administrator, initially, until you set up some other users). You basically get a DOS prompt. Cool! What was less straightforward was getting files onto it.
What didn’t work:
- SCP – I kept getting an “exec request failed on channel 0” error
- Trying to get the Pi to download files using an Invoke-WebRequest via PowerShell running on the Pi. The version of PowerShell seems to be missing some modules.
What did work:
- The Pi appears on the LAN as a Windows network share. You can use a Windows PC and put in
\\192.168.1.10\c$(or whatever your IP address is) and then login asminwinpc\Administratorwith your password. Voila! - Similarly, on a mac, you can access it via the Finder using Go > Connect to Server
smb://192.168.1.14/c$(or whatever your IP address is). The Pi will also then appear under/Volumes/c$/ - Once the share has been opened, it’s straightforward to copy files to and from the Pi.
Running Software on Windows IoT Core
As mentioned above, the standard way to get software running on Windows IoT is for Visual Studio to load it onto the Pi over the network. However, I’m more interested in running standard server apps that don’t rely on the Microsoft ecosystem, so I focussed my efforts on getting Node.js to run on the Pi.
Microsoft is doing some very cool stuff around supporting platforms like Node.js and even Python on Windows IoT. It’s still very much in its early days, but shows promise.
Here’s what I did:
- I downloaded and installed the Node.js Tools for Windows IoT (v1.1) from GitHub. These were installed into
C:\Program Files (x86)\Node.js (chakra)\ - I copied the whole
Node.js (chakra)\installation directory over to the Pi intoC:\Node.js\ - I downloaded the ARM version of node.exe from the same GitHub page as above, which I copied over the top of the previous (Intel version of) node.exe in C:\Node.js\
- Set up the
APPDATAenvironment variable to be somewhere useful (it wasn’t set for me):set APPDATA=C:\Users\Public - Set up other useful environment variables for Node by running:
C:\Node.js\nodevars.bat - Now commands like “
npm install -s express” and “node test.js” work.
While I could run simple Hello World style programs with Node that wrote text out to the screen, I was unable to get working a slightly more advanced Node program that ran a basic webserver.
Conclusions
It was fun to see Windows 10 boot up on the Raspberry Pi. However, I was a little disappointed how limited it was, given how powerful a Pi is with the default Linux-based OS.
Microsoft’s approach to developing for the Raspberry Pi brings something new to the space, and may make the platform more accessible to developers who are already adept with Microsoft tools. Still, it would’ve been nice to see the basic image come with something immediately useful, if only the new Edge web browser (this would’ve make super-cheap Internet Explorer based kiosks really simple to create).
There’s the old saying that you should always wait for the third version of a Microsoft OS. I don’t know if we’ll need to wait that long for a compelling Microsoft OS on Raspberry Pi, but I am excited to see what Microsoft does with this in future.