
Pizza Base Recipe

We probably have pizza of one sort of another every couple of weeks. I’d like to say it’s always home-made. I’d like to say that.

However, I can say that we do make our own pizza regularly. So, I’ve been meaning to put up this recipe before, but for some reason it gets eaten before I think to take a picture. But last weekend, I happened to take a couple of snaps, so here’s the recipe.

It’s based on a recipe in Donna Hay magazine (issue 25), but you’ll need to come up with the pizza topping yourself. This time, we had a “leftover pizza” with roast chicken and vegetables, and a salami pizza with salami and sliced olives. I’m always willing to try new pizzas!

Ingredients

1 teaspoon dry yeast (or 1 packet, approx. 7g)
1/4 teaspoon (~1mL) caster sugar
3/4 cup (~190mL) of lukewarm water
1 1/2 cups plain flour
1/2 teaspoon (~2mL) salt
1 1/2 tablespoons (30mL) olive oil
50mL tomato paste
dried oregano to taste (approx 2 teaspoons or ~10mL)

Method

If it’s been cool (like it is in Melbourne at the moment), fill the sink with warm water to a couple of inches, and place a large mixing bowl in it for a few minutes to warm it up. The dough will rise better in a warm bowl.

Meanwhile, put the dry yeast and sugar in a measuring cup and fill it with lukewarm water from the tap. Stir well to ensure all the yeast is broken up. Set it aside for 5 minutes.

Place the flour and salt in the warm mixing bowl, and make a well in the centre. Pour the olive oil and the yeast mixture into the flour, and stir it together with a butter knife to make a dry dough.

Take off any rings or a watch (this stuff sets like concrete). Knead the dough (you can leave it in the bowl) for a few minutes until it is smooth and elastic. This step can be shared with a young child (!).

Cover the mixing bowl with a cloth and leave somewhere warm for 45 minutes, or until the dough has doubled in size. I’ve found good places to be: the shed, the car, or even back in the sink with some more warm water.

You can leave it for longer than 45 minutes, but if you leave it more than a couple of hours, the yeast will have eaten all the sugar and the dough will be rather sour.

When you’re ready to make the dough into bases (this recipe is enough for two medium-sized pizzas), preheat the oven to 220 degrees Celcius. Put the pizza trays that you’re going to use in at the same time, to help ensure a crispy crust.

Pound the dough down into a ball and split into two. Spread each ball out on a piece of baking paper (saves having to flour a bench top), making a flat disc.

If you don’t have a rolling pin handy, or don’t like the hassle of rolling, just pop another piece of baking paper on top of the dough, and using a smooth object (e.g. glass, rolling pin), press the dough out until it is the shape you want.

When you’ve got the two plain bases ready, spread each with half of the tomato paste and sprinkle with the dried oregano. Then, go crazy with whatever topics you like.

Serves 2 adults.
Almond Praline Recipe

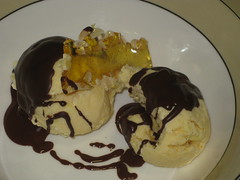
This is the last part of my “Icecream with Nuts and Ice Magic (but fancy)” recipe from Recipe Club. It’s not particularly novel, but it did complete the dish. Together with the crunch of the white chocolate in the icecream and the crunch of the chocolate shell from the ice magic, the praline added extra crunch that went really well with the smooth icecream, creating a bit of a play of textures and sounds.

I took this recipe from the MasterChef Australia cook book which I got for Christmas. Really, it’s been a book that is more about the reliving of great moments from the TV series, but there are some cracking recipes in there as well. The praline is part of the sticky date pudding recipe (which I can also vouch for).

Ingredients

1/4 cup (~35g) of slivered almonds
1/2 cup (125mL or ~110g) of caster sugar
2 tablespoons (40mL) of water

Method

Start by roasting the almonds. The way I do this is to put them on a piece of foil under the grill, and mixing them around every 30 seconds or so. Within a few minutes they should be smelling good and lightly browned.

Put a piece of baking paper onto a baking tray or sheet, and scatter the almonds onto it, over an area of roughly 20cm x 20cm. Let them cool while continuing with the recipe.

Combine the sugar and water in a saucepan, and cook over a medium heat. Instead of stirring (the candy will stick to a spoon), swirl the syrup regularly. The sugar will disolve, and begin to bubble a lot. Keep going until the syrup becomes a deep golden colour, like honey. This will take a few minutes.

Remove the saucepan and immediately pour over the almonds, and then tip the tray from side to side to cause the candy to cover all of the almonds.

Wait until it sets, and break into shards. They can be stored for a couple of days in an airtight container.

Serves 6-8.

Double White Chocolate Ice Cream Recipe

The other key part of the recipe from my “Recipe Club” dessert (the previous part being the Ice Magic) was the ice-cream itself. The main problem here for me is that I don’t currently have an ice-cream maker; the last one exploded in the pantry when it got too hot one summer. So, I needed to find a recipe that explained how to make it without one.

I was rescued by a recipe book called Ice Cream (of course) by Joanna Farrow and Sara Lewis. Sadly, this book has been in my possession for several years now without ever being used. It survived several house moves when other books were culled, and clearly there was method to the madness since it turned out to have exactly the sort of recipe that I was looking for.

Ingredients

4 egg yolks
75g caster sugar
1 teaspoon (5mL) corn flour
300mL milk
250g white chocolate (happily Whittakers still makes good chocolate in 250g blocks)
2 teaspoons (10mL) vanilla extract
300mL whipping cream (~35% milk fat)

Method

With the egg yolks, caster sugar and corn flour in a large bowl, stir with a fork until it is well combined and slightly bubbly.

Then pour the milk into a saucepan, place over a medium heat on the stove, and bring to the boil. Remove from the heat and drizzle into to egg mixture, stirring all the while, and you’ll end up with a basic custard mixture in the bowl.

If you’re like me, you’ll have ended up with milk cooked onto the bottom of the saucepan, and will need to get another one or do a quick clean.

Pour the custard mixture back into a saucepan, place over a low heat on the stove, and stir constantly until the mixture thickens, perhaps to the consistency of a pouring custard. It will also get really smooth at that point, which is another good indicator. Don’t try to over-thicken the custard.

Remove the custard from the heat, and pour into a large, freezer-proof bowl.

Break 150g of the white chocolate into small pieces. Then gently stir those pieces into the hot custard, along with the vanilla extract. Leave it to cool for 20 mins or so, and then place in the fridge to chill. This should take about another hour.

Put the cream into a bowl (yes, another one), and whip it with an electric beater until it has thickened, but “still falls from the spoon”. You should see the cream beginning to form little lumps at this point, and it will have doubled in volume.

Remove the bowl of chilled custard from the fridge, fold the whipped cream into it, and put it in the freezer for three hours.

Remove it from the freezer. Using a fork, pull the icecream away from the sides of the bowl. Then, using an electric beater, blend together the frozen and unfrozen parts of the mix for about a minute. The ice cream mixture should be the same consistency as a good milk-shake. Return to the freezer again for another two hours.

Finely chop the remaining white chocolate, so that the pieces are about the same size as choc bits.

Remove the ice cream from the freezer again. Follow the same approach as before with the fork and electric beater, and this time stir in the white chocolate as well. The ice cream mixture should be the same consistency as a thick-shake. Return to the freezer again for another two to four hours, or until firm.

Makes about 1L of ice-cream, so will serve about 8 if presented in cones or about 4 if presented in bowls.

Ice Magic Recipe

I’m in a “Recipe Club”, where we get together once a month for dinner, to share food on a particular theme, and try out favourite recipes or those we hope will become favourites. This month, the theme was chocolate, and I had volunteered to make a dessert.

Towards the end of summer, I had gotten into Cottee’s Ice Magic again (although, to be honest, it was the Woolworths’ brand version). It had been years since I’d had it and was surprised that it was still good. And, as you do, I’d been wondering how it works and whether you could make some yourself that tasted *really* good.

So, this was in the back of my mind when I was trying to think up a chocolate dessert, and so I decided to see if the Internet knew the answer. And it did.

The main trick was finding refined Coconut Oil. It is the essential ingredient, as it is liquid above ~24 degrees Celcius but solid below that. Hence, it is liquid at room temperature (at least, in summer) but sets when poured on ice-cream.

I easily managed to find a jar of Melrose Organic Refined Cocout Oil (Butter) in a random health food store in Melbourne city. Unless you really want a coconut taste, make sure you get the refined variety rather than the virgin variety.

My final dessert was home-made double white chocolate ice-cream with almond praline and this recipe for Ice Magic over the top. However, that’s for another post.

Ingredients

40g good quality chocolate (it will taste just like the chocolate)
15mL refined coconut oil

Method

If the oil has turned solid, stand in a bowl of hot water until it returns to liquid state.

Break the chocolate into pieces and place in a microwave-safe container. Place in a microwave on a low setting (e.g. 30% of a 800W unit) for a minute or so until the chocolate sags and is beginning to melt, then remove.

Stir the oil into the chocolate until fully combined, forming a chocolate syrup.

Pour the syrup over cold icecream to serve. It should set within a minute, forming a hard chocolate shell.

If the syrup sets while you are storing it, you can microwave it back to life or rest the container in a bowl of hot water.

Serves 2-3 people.

Easter Bread and Butter Pudding Recipe

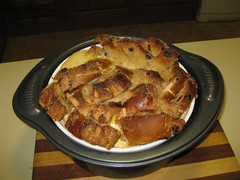
If you’re anything like us, and had more Hot Cross Buns in your house this Easter than you knew what to do with, then this recipe is for you. Previously, I’ve recommended French-toasting them, but baking them into a pudding is also a very satisfying option. We served them up for a dessert at a family lunch today, and it was very yummy.

This is based on the recipe for Bread and Butter pudding from Donna Hay’s Modern Classics Book 2.

Ingredients

600g slightly stale Hot Cross Buns (we used an 8pk of Woolworths bakery buns)
~100g Spreadable butter
4 large eggs
4 cups (1L)  milk
1/2 cup (125mL) brown sugar
1 teaspoon (5mL) vanilla extract
~1 tablespoon (15mL) raw sugar (a.k.a. demerara sugar) for topping
Water for hot water bath

Method

Preheat oven to 160 degrees C.

Leave the buns in a block, and slice off the “crusts” from the sides and bottom (leave the crosses on). Then slice the block of buns in half, butter both sides and put back together.

Slice the block into thumb-width strips, e.g. 2 buns long and something like 1/3 or 1/4 of a bun wide. Butter the sides of the strips.

Grease a 6 cup (1.5L) round baking dish, and arrange the strips around the inside. A nice pattern is to put the strips in pointing up, but on an angle, arranged in concentric circles.

Place the eggs, brown sugar and vanilla extract in a bowl and whisk briefly. Then add milk mix to combine.

Pour the liquid over the buns in the baking dish and stand for 2-3 minutes.

While waiting, boil some water. When finished, sprinkle raw sugar onto the buns, place baking dish into a baking tray, and pour water into baking tray so that it comes half-way up the sides of the baking dish.

Put the whole thing into the oven and bake for 65 minutes (or until the liquid sets).

Remove from oven and let stand for 5 minutes before serving with cream or ice-cream.

Serves 6-8 people.

Nuts and Bolts Recipe

My grandfather always makes this recipe at Christmas, so for me it is part of that bundle of food associations that make this time of year particularly special. However, this year he’s been a little unwell, so didn’t have time to make the stuff. He normally produces enough Nuts and Bolts to feel a small nation, and gives gifts of the savoury snack to every family member. The dinner table wouldn’t have been the same this year without it, so I made a quick batch. It is deliciously more-ish!

Ingredients

250g dry-roasted peanuts, unsalted
300g Kellogg’s Nutri-Grain (these are the “bolts”)
1/2 cup (125mL) of light oil (preferably peanut oil)
45g packet of French Onion Soup mix
1 tablespoon of curry powder
1 teaspoon of mustard powder

Method

Heat the oven to 180 degrees Celcius.

Mix together all the dry ingredients in a large mixing bowl.

Warm oil in microwave, for example, on High setting for 30 seconds, then pour over the dry ingredients and mix well.

Spread the mix across a large, flat baking dish and put into the oven for 15-20 minutes, removing to stir every 5 minutes or so. The result should look dry and smell very aromatic.

Remove from the oven and allow to cool before eating. Needs to be stored in an air-tight container.

This recipe is easily adaptable to taste, e.g. use more or less Nutri-Grain, nuts, curry or mustard as your taste dictates.

Makes enough Nuts and Bolts to fill a 2L container. Best eaten before 1st January.

Reblog this post [with Zemanta]

Choc-Mint Biscuit Recipe

We took some time off, over the Cup Day long weekend, and I took some of that time to do some baking. The most recent Donna Hay magazine (issue 47) has many seductive pages of biscuit recipes, and I succumbed to this one that makes biscuits that taste like a cross between a choc-fudge brownie and an after dinner mint. Donna Hay calls them Chocolate Peppermint Crackles, but it would be simpler to just call them Choc-Mint Biscuits.

Ingredients

1/2 cup (125mL) hard peppermint lollies
200g dark chocolate
80g butter
1 1/2 cups (375mL) brown sugar
2 eggs
1 teaspoon vanilla extract
1 1/4 cups (310mL) plain flour
1/2 cup (125mL) cocoa
2 teaspoons baking power
1/3 cup (80mL) milk

Method

Get the butter out and allow it to soften.

Start by turning the hard peppermint lollies (I used the supermarket’s home-brand peppermint) into a power that the biscuits will be coated with. Put the lollies into a food processor or spice/coffee-grinder and process until they become a fine powder. Set it aside.

Break up the dark chocolate into small pieces for melting. You can either melt it the traditional way (in a heatproof bowl sitting above a simmering saucepan of water) or the fast way (a minute or so in the microwave). Either way is fine as the chocolate will be going into the biscuit mix, and it doesn’t matter if the chocolate loses its shine. Once the chocolate is mostly melted, stir until it is fully melted. Then set it aside.

Now we can start on the biscuit mix.

If the butter isn’t soft, give it a little zap in the microwave. Place the softened butter and brown sugar into a mixing bowl, and beat with an electric mixer for 2-3 minutes.

Add both eggs, beating well after adding each. Add in the vanilla. Then beat on high for another 2-3 minutes until the mix is pale and creamy.

Add the melted chocolate into the mix, and beat well.

Sift the flour, cocoa and baking powder into the mix, stir in the milk, and then beat until smooth.

Cover the mixing bowl with cling wrap and put into the fridge for 30-60 minutes, until the mix is very firm.

Preheat the oven to 180 degrees Celsius (355 degrees Fahrenheit).

Spread some of the peppermint powder onto a plate.

Take the mix out of the fridge. Scoop out heaped teaspoons of the mix, roll them into balls, and roll the balls in the peppermint powder until thoroughly coated.

Lay the balls out, well-spaced, on baking trays lined with non-stick baking paper. Bake for 12-14 minutes. The balls should spread out and the white coating should crack.

Cool on the trays. Makes between 40-50 biscuits.

Like a chocolate brownie, they are probably better the day after baking.

Reblog this post [with Zemanta]

One Tin Slice recipe

When Kate and I went to the show the other month, we of course visited the Country Women’s Association of Victoria stand. It’s a mandatory visit to have tea and scones there, and admire the extensive tea-towel collection of its members.

What leads to this post is that Kate impulse-bought a copy of The A to Z of COOKED & UNCOOKED SLICES. A retro self-published cookbook without any pictures, but with eight different Caramel Slice recipes, seven different Lemon Slice recipes, and this recipe called One Tin Slice from someone by the name of Stella Warton from Benalla.

It’s functional name belies the sheer tastiness of this sweet slice. I feel compelled to share it with others! Thanks Stella.

Ingredients

125g Arnotts Nice (or equivalent) biscuits, i.e. half a 250g pack
100g butter
180g choc bits
1 cup of mixed nuts (try to include almonds)
1 cup of dessicated coconut (or shredded coconut)
395g sweetened condensed milk

Method

Get things ready by preheating oven to 180 degrees, then finding a 28cm x 18cm slice tin, greasing it, and lining it with greaseproof paper. Also, crush the biscuits well so there are no big pieces, and crush the nuts so they’re about the size of peanuts. (Don’t crush the biscuits and nuts together, in case you were thinking about that.)

Melt the butter (e.g. in the microwave), and pour into the slice tin so the butter covers the base.

Now, sprinkle in the ingredients into the tin in layers. Start with the crushed biscuits (make sure there are no big gaps), then add choc bits, then half the coconut, then the crushed nuts, then the rest of the coconut. Lastly, pour the sweetened condensed milk over it all.

Bake in the oven for 25 minutes until the slice has turned brown. Cool in the tin a little before removing and slicing.

Should make about 24 pieces.

Sour Cream, Orange and Raisin Pie Recipe

Sour cream, orange and raisin pieThis is a recipe from the most recent Donna Hay Magazine (issue 38). This is not the first recipe to leap out at you, but I’m here to tell you that it’s worth it. It’s not very sweet, and the combination of ingredients is not particularly common. It’s awesomely yum.

Ingredients

1 cup plain flour (for pastry)
1/2 cup caster sugar (for pastry)
1/8 teaspoon baking powder (for pastry)
100g softened, unsalted butter (for pastry)
1 tablespoon of water (for pastry)
1/2 teaspoon vanilla extract (for pastry)
1 1/4 cups raisins (remove all stems)
2/3 cup orange juice
1 tablespoon orange rind (equivalent to 1 small orange)
2/3 cup caster sugar
1 tablespoon plain flour
2 eggs
1 cup sour cream

Method

Firstly, we need to make the pastry, so be aware you’ll need about 30-40 mins for this before the real cooking starts.

Sift flour, sugar and baking powder into a mixing bowl. Cut the butter into very small pieces and mix into the dry ingredients with your fingers using a clicking motion. Or just do it all in a food processor. It should form a bread-crumb consistency.

Add the water and vanilla extract, and mix through. It should now stick together form a smooth, dough ball.

Cover in cling-wrap, and place in the fridge for 30 minutes. Go away and make yourself a cup of coffee, or watch an episode of Scrubs.

Preheat oven to 160 degrees.

Grate the orange rind. Remove the pastry from the fridge to let it soften a little (especially if you’ve left it for more than 30 minutes like I did).

Warm raisins and orange juice together in a small saucepan over low heat for about five minutes. Raisins will soften. Then add the orange rind, caster sugar and flour. Stir to combine, and cook for another five minutes until the mixture thickens a little. Remove from stove.

Blend sour cream with the eggs in a bowl, and then stir in the orange mixture.

Roll out the pastry. Grease a 24cm shallow pie tin, and line it with the pastry. Place the pie base on a baking tray, and pout the filling mixture into the base (do not overfill).

Bake for about 40-45 minutes or until cooked through. Serves 6-8.

Cheesecake Recipe

Last piece of cheesecakeIs it “cheesecake” or “cheese cake”? The former looks like it has an “e” too many, and the latter looks as bizarre as “salad pudding”. But you know what I mean.

I made this.. uhh.. cake for the first time on the weekend, from Donna Hay’s Modern Classics Book 2. Again, this book has come through for me, and I’ve rewarded it by almost completely plagiarising the recipe below (although she calls it the “classic baked cheesecake”). It was much simpler than other recipes I’ve made before that used a water bath, and at least as tasty.

Ingredients

125g Arnotts Nice (or equivalent) biscuits, i.e. half a 250g pack (for base)
2/3 cup almond meal (for base)
60g butter (for base)
1.5 tablespoons cornflour
1.5 tablespoons water
330g softened cream cheese (do not buy Philadelphia spread – buy the stuff in a rectangular box!)
360g fresh ricotta cheese
4 eggs
1 1/3 cups white sugar
1 medium lemon (or specifically, the juice and finely grated rind from one)

Method

If you haven’t yet, get the cream cheese out of the fridge and let it soften.

Crush the biscuits in a food processor (or like me, grind up in a mixing bowl mortar-and-pestle style using the end of a rolling pin). Melt the butter, then add in the almond meal and melted butter, processing (or stirring) until nicely combined.

Grease a 22cm springform tin, line the base with greaseproof paper, and press the biscuit mix into the bottom to form the base. Put it in the fridge while we make the filling. You can probably get the oven going at 150 degrees celcius, too.

If you haven’t yet, grate the lemon to produce about a tablespoon of rind, then juice it to produce about 60 ml of juice.

Mix the cornflour with the water in a medium-large mixing bowl, until blended. Ensure your cream cheese is softened, cut it up into small pieces and drop into mixing bowl. Stir together until it forgets its original shape.

Add in the ricotta cheese (and stir), the eggs (and stir), the sugar (and stir), the lemon rind (and stir), the lemon juice (and stir). Stir until smooth. Or forget all this stirring and just put it in your food processor.

It’s okay to have some small cream cheese “lumps” in the mixture, but squash any large lumps.

Get the base out of the fridge, and pour the filling in. Then put into the oven for at least 70 minutes (according to Donna).

Maybe our oven is stuffed, but after an hour we raised the temperature to 160 degrees, and kept cooking for another hour again. You can tell when it’s cooked because it will be browned a couple of inches from all the edges, and if you poke a skewer into the middle it will leave a hole when it’s removed.

Let the cake cool a little, and then put into the fridge until it is time to serve. Serve with thick cream.

Serves 8.