The Original Ice-cream Recipe

If it was me, I’d be crowing it from the rooftops, but Bernardo Buontalenti’s Wikipedia page is strangely silent on the fact that he invented ice-cream. This may have something to do with being dead for several centuries, and hence he’s not around to fix it. However, if you do a Google search for him, you will uncover information like…

Bernardo Buontalenti (Florence, 1531-Florence 1608) was a Florentine stage designer, architect, theatrical designer, military engineer and artist. …  Besides that, he is also traditionally considered the inventor of modern gelato. The Grand Duke Cosimo I de’Medici wanted him to organize an opulent banquet to celebrate the Spanish deputation, that had to stand open-mouthed in front of so much splendour. Buontalenti invented a new dessert for the occasion: a sorbet made with ice, salt (to lower the temperature), lemon, sugar, egg, honey, milk and a drop of wine.

Fantastic Florence

This may not be completely historically accurate, and other Italians also appear to have a claim to being the inventors, or perhaps even some Americans deserve the credit. However, it’s intriguing to think that before the 16th century, no-one had combined the ingredients of milk, egg, honey and ice in the appropriate way to create this dessert, despite those ingredients being available for thousands of years.

However, three things happened recently that have led me to a renewed interest in this. Firstly, our freezer died and has been replaced with a much larger one. Secondly, our beaters died and were replaced with a mix-master that came with an ice-cream maker bowl. Thirdly, summer arrived!

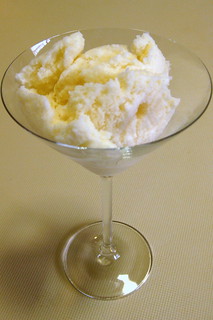
I have tried to find a recipe that matches the original ice-cream (gelato) recipe, but it appears to be a closely-guarded secret. However, I did come across one recipe for “Buontalenti” ice cream that has turned out very well, and importantly, doesn’t have silly instructions like checking if things coat the back of a wooden spoon. Here’s my Australian conversion of it:

Ingredients

  • 4 large eggs
  • 2 cups (500mL) full-cream milk
  • 180mL caster sugar
  • 3/4 cup (187mL) thickened cream (eg. 35% milk fat)
  • 1/2 teaspoon (2.5mL) liquor for flavouring – in my case I used Grand Marnier but it’s apparently more traditional to use Disaronno Amaretto

Method

  1. Separate the eggs, and place the yolks into a mixing bowl.
  2. Add half the sugar to the bowl, and whisk for a couple of minutes until thick and slightly pale in colour.
  3. Fill the sink with cold water, add some ice-cubes, and place a large, metal mixing bowl in there with a sieve on top. This will come in handy later.
  4. Place the remaining sugar along with the milk into the medium-sized saucepan and heat, stirring regularly, until the sugar has dissolved and the milk is just about to simmer.
  5. Remove the saucepan and pour it slowly into the egg-and-sugar mixture, whisking all the while.
  6. Then pour the mixture back into the saucepan and place over a moderately-low heat, stirring continually, until the temperature reaches 75 degrees Celcius. The mixture should have thickened slightly, becoming a thin custard.
  7. Remove the saucepan and pour the custard into the chilled bowl, through the sieve. Let it cool for a little while, then place in the fridge until completely chilled.
  8. Mix in the cream and liquor.
  9. Process in an ice-cream maker until it forms the consistency of soft ice-cream and increases in volume. Store in the freezer for at least a couple of hours before serving.

Makes about 1.5L of gelato.
Coconut Ice Recipe

My first memories of Coconut Ice are from my primary school years, where one of our school holiday babysitters made it one day. Despite the childhood associations and, of course the fact it contains sugar, I was never particularly fond of this confection as it contains that most dreaded of ingredients – copha. The fatty residue that copha leaves on my tongue renders any otherwise tasty treat sadly into a nasty treat.

However, in digging around for recipes for the upcoming Carribean dinner at our recipe club, I’ve come across a recipe for Coconut Ice that doesn’t contain copha, and actually matches the description on the tin – it is a  frozen coconut dessert. That said, it does taste a lot like the other Coconut Ice  so it has the added bonus of having childhood associations, too, just without the copha.

I’ve made this twice now, and it is quick and straightforward. The icing on the cake is that it doesn’t require an icecream maker, so I can theoretically decide to make it in a morning and then eat it in the evening, which will be great coming into summer!

The original recipe is from the Island Flave website.

Ingredients

  • 200g dessicated coconut
  • 200mL warm water
  • 1 cup caster sugar
  • pinch of cream of tatar
  • 2 cups (500mL) full cream milk
  • almond essence
  • 1 egg (but really we just want the yolk)

Method

  1. Mix the coconut with the water in a small bowl to rehydrate it. Pack it down and then cover with cling film. Set it aside for at least 10mins.
  2. When coconut is rehydrated, separate it using a fork, then scoop out 1 cup (250mL) of the coconut and place it in a large mixing bowl with the sugar and cream of tatar.
  3. Put the remaining coconut into a fine sieve, pack it down, and place the sieve over the mixing bowl.
  4. Heat the milk in a saucepan, without stirring, until the milk is about to boil.
  5. While the milk is heating, separate the yolk from an egg, and place in a small container. Beat the yolk until it is runny.
  6. When the milk is ready, remove from the heat, remove any film from the top, then gently pour it through the sieve. Press down on the coconut with the back of a spoon to squeeze all the milk through. Discard the coconut from the sieve as it is now pretty tasteless.
  7. Stir the mixture until the sugar is dissolved. Mix in the egg yolk and a few drops of almond essence (no more than 1/4 teaspoon or it will taste very almondy).
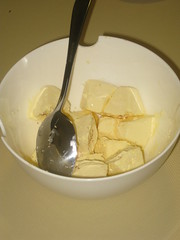
  8. Pour the mix into a 1L container and place in the freezer for a few hours or overnight.
  9. While in the freezer, the mix will separate and the top will go hard. So, at least a couple of hours before serving, remove the mix from the container, break into chunks, and blend well with a stick mixer or blender, before returning to the freezer.

Bulgogi Recipe

I post all the recipes for the dishes that I make for Recipe Club over on its own blog. However, where there’s a recipe I expect to make again, I’ll also post it here to ensure I can easily find it down the track. In this case, we made a Korean-style beef bulgogi again the very next night after I made it for Recipe Club, I liked it that much! It’s largely based on the recipe by Ben O’Donoghue in his book Ben’s Barbecue.

It serves enough portions to feed 6 as an entree, or 3 as mains.

Ingredients

  • 500g rump steak
  • 3 tablespoons (60mL) brown sugar
  • 125mL light soy sauce
  • 4 cloves of garlic
  • salt
  • 100mL mirin
  • 2 tablespoons (40mL) sesame oil
  • 1 bunch spring onions
  • sunflower or vegetable oil
  • 1 medium carrot
  • leaves of 1/2 iceberg lettuce
  • mint leaves
  • ~200g kimchi
  • other korean sauces that take your fancy

Method

  1. Trim the beef of fat and slice thinly. Chop the garlic cloves finely. Slice the spring onions finely.
  2. Combine the sugar, soy sauce, garlic, salt, mirin, sesame oil, and spring onions to make the marinade, and mix the beef slices through.
  3. Leave in the fridge for at least 2 hours or overnight.
  4. When it comes to cooking the beef, bring the beef mix to room temperature, then heat a BBQ hotplate to medium-hot.
  5. Chop the carrot finely while waiting.
  6. Oil the hotplate, and begin frying the meat. Once they’ve begun warming, then add the carrots, and fry everything together. It takes only a few minutes to cook so it’s tender.
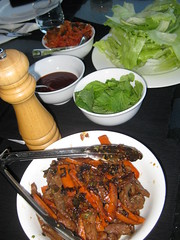
  7. Transfer bulgogi to serving dish and place on table together with lettuce leaves, kimchi, mint leaves, and any other tasty Korean sauces that take your fancy. Before eating, place everything on a lettuce leave and wrap into a delicious parcel.

Alternatives

  • Instead of serving on lettuce, it would work also served on rice.
  • Sesame seeds can be sprinkled over the top of the beef before serving, or toasted and included in the marinade. However, with the sesame oil it already has a nice sesame taste.
  • According to Ben’s original recipe, instead of rump steak, sirloin can be used, instead of brown sugar, palm sugar can be used, and instead of mirin, rice wine can be used.

Brandy Butter Recipe

Of course, I nearly gorged myself on food at the family Christmas dinner yesterday. It was the second family feast this season, having had a Christmas feast with the Melbourne branch of the family a couple of weeks ago. For both, I made what is for me a traditional condiment for the pudding. It’s very easy, no doubt about it, but something that’s become absolutely essential: the brandy butter. (It also goes by the name “hard sauce“.) Drop it on the steaming hot pudding, watch it melt, and eat it as it soaks in.

I base my recipe on how I remember my grandmother’s brandy butter tasting. While some recipes suggest icing sugar (a.k.a. confectioner’s sugar), I prefer caster sugar (a.k.a. baker’s sugar) because of the texture. Also, I’ve got a fairly light amount of brandy in this recipe, and even my three-year old is known to have eaten it. You can probably double it, if you like a stronger taste.

Ingredients

  • 250g unsalted butter
  • 1 cup (250mL) caster sugar
  • 2 tablespoons (40mL) brandy
  • ground nutmeg, for decorating

Method

  1. Bring the butter close to room temperature, so it has become soft. Place in a bowl and using an electric beater, whisk on medium-high until it has become creamy.
  2. While continuing to whisk, slowly add the sugar. The mix will become whiter and fluffier.
  3. Continuing to whisk, slowly add the brandy. Stop when mixed through (should take 15 seconds or so).
  4. Using a teaspoon, drop spoonfuls of the mixture into an ice-cube tray. When the tray is full, tap it on the bench to level, and then lightly sprinkle the top with the ground nutmeg, before placing in the freezer to set (should take an hour or so).
  5. Just before serving, remove from the freezer, and run the back of the tray under a hot tap. A couple of gentle whacks should now dislodge the brandy butter.

Makes ~20 large cubes of brandy butter.

Stonehenge Slice Recipe

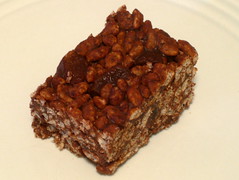
This is another easy and tasty slice from the Country Women’s Association slice cook-book. The first time I made this, I followed the recipe and used dried apricot, but this time I used crystalised ginger and it worked a treat.

Consider it to be something like Adult Chocolate Crackles. I guess it’s called Stonehenge Slice because you could cut it into thin slices and assemble your very own Stonehenge, if you really wanted. Or even get more creative.

Ingredients

  • 185 g dark chocolate (I prefer 55%)
  • 125 g butter
  • 125 g caster sugar
  • 125 g pieces of crystalised ginger
  • 3 1/2 cups rice bubbles (probably something like 125 g, too)

Method

  1. Chop ginger into small pieces.
  2. Grease a 18cm x 28cm slice tin.
  3. Break chocolate into pieces and put chocolate in a microwave-safe bowl. Microwave on HIGH for 60 seconds.
  4. Chop butter into pieces and add to bowl. Microwave on HIGH for 30 seconds then stir. Keep going like that until just melted.
  5. Place rice bubbles in a large bowl and combine with the ginger and sugar.
  6. Pour in the melted chocolate and mix together gently.
  7. Press into the slice tin, cover and refrigerate for a couple of hours.
  8. Cut into slices in the tin before serving. (Keep unused slice in the fridge.)

Microwave Porridge Recipe

One of the reasons I post recipes on my blog is so that it’s easy for me to find them later. The category of Recipes on the blog is a bit like an ever-expanding personal recipe book.

And while this recipe is rather mundane, it was worked out through long trial-and-error to determine the optimal times for our 800W Sharp Carousel Microwave Oven. Coming into the warm weather, we are likely to have less porridge, and if I don’t write this down somewhere, I will probably have forgotten by the time the cold weather returns.

It is what Harriet reliably asks me for breakfast every morning, so woe betide me if I ever forgot how to make it. (She will consent to eat croissants instead of porridge, but I don’t think that’s a long term option.)

However, while it is simple to make, porridge is the prince of breakfasts. It’s healthy – low GI, low in gluten, low in sugar, high in fibre, high in protein. It’s been eaten for at least 4,000 years. There’s a special day devoted to porridge (10th October is World Porridge Day, if you must know). With a little creativity, it can be made into a variety of flavours.

I find the rolled oats packet’s suggested amounts make too little. Simply doubling them makes too much. These amounts are just right.

Porridge (Oatmeal) for One

Ingredients

  • 1/2 cup (125mL) rolled oats
  • 1/2 cup water
  • 1/2 cup full-cream milk

Method

  1. Mix all ingredients in a decent-sized microwave cooking pot (eg. a rice cooker). Place, uncovered, in microwave for 3:00 mins on HIGH (for 800W oven).
  2. Remove and give a quick stir. Return to microwave for 2:30 mins on HIGH.
  3. Rest porridge for 2:00 mins, then scoop out into a bowl.

Porridge for Two

Ingredients

  • 1 cup (250mL) rolled oats
  • 1 cup water
  • 1 cup full-cream milk

Method

  1. As above, mix all ingredients in a microwave cooking pot, then place, uncovered, in microwave for 5:00 mins on HIGH.
  2. Remove and give a quick stir. Return to microwave for 3:00 mins on HIGH.
  3. Rest porridge for 2:00 mins, then scoop out into two bowls.

Variations

  • If you like, you can probably add a pinch of salt, and also an additional flavour like cinnamon or vanilla into the porridge.
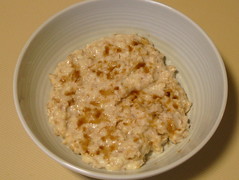
  • Our traditional toppings are 1/2 teaspoon of brown sugar or a drizzle of local honey. However, maple syrup, fruit jam, breakfast cereal, or yoghurt could also work if they are more to your taste.

Dulce de Leche Pionono Recipe

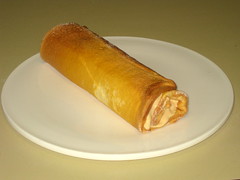
The upcoming recipe club dinner is themed Argentina, so I’ve been looking into Argentine desserts. It seems that the key ingredient is Dulce de Leche – basically a thick, sweet caramel sauce – so it was a given that this sweet ingredient would feature.

Helping me along, I came across a great website called From Argentina With Love that had an interesting-sounding recipe for Pionono (an Argentine dessert roll), from which this recipe is heavily based. I also had some assistance from this other Pionono Recipe.

Ingredients

  • 1/4 cup plain flour
  • 1/4 cup caster sugar
  • 5 eggs
  • 1 teaspoon honey
  • extra caster sugar
  • 200mL whipping cream
  • 1/4 teaspoon vanilla extract
  • 200g dulce de leche (I used Nestle Top-N-Fill Caramel)

NB. The Nestle Top-N-Fill Caramel is basically caramelized sweetened condensed milk, and was available as a 380g tin in my supermarket in the section along with cooking chocolate and vanilla extract.

Method

  1. Heat the oven to 200 degrees Celcius.
  2. Take a shallow tray, 25cm x 38cm (I think it’s sometimes known as a swiss roll tray), grease it, line the bottom and sides with a sheet of grease-proof paper, then grease the paper.
  3. Sift the flour into a small bowl and set aside.
  4. Put the eggs, sugar and honey in a large mixing bowl, and beat with a mixer on high for at least 8 minutes, until the mixture expands to several times the original volume and forms a marshmallow consistency.
  5. Add the flour into the mix, and continue to beat for another minute until well combined.
  6. Pour the mix evenly across the tray (even the corners), spreading with a flat knife if necessary.
  7. Place in the oven, and cook for 8-10 mins. It will be done when the cake springs back at a light touch. You may want to rotate the tray after 6 mins to ensure it cooks evenly.
  8. While waiting for the cake to cook, get a clean and dry (non fluffy) tea towel. Lay it out and sprinkle lightly with caster sugar. Use your fingers to ensure it is covered evenly.
  9. Take the tray out of the oven, invert it onto the tea towel. Remove the tray, and gently peel off the grease-proof paper.
  10. While still hot, roll up the cake in the tea towel, and set aside to cool for a couple of hours.
  11. During this waiting time, prepare the filling. Pour the cream into a mixing bowl and beat until stiff peaks have just formed.
  12. Add the dulce de leche and vanilla and stir to combine. Then beat for another minute or so, until the mixture thickens. Place in an airtight container and chill in the fridge.
  13. When the cake is cool, unroll it, spread the filling across it, and re-roll. Ideally, serve immediately, but it will keep in the fridge in an airtight container for another day or two.

When serving, slice into generous chunks. Serves 6-8.

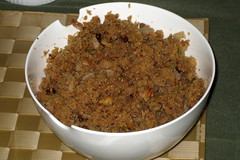
Dijon Stuffing Recipe

By luck, and a little bit of planning, the night of our October recipe club dinner fell on Canadian Thanksgiving. So, the theme was a given.

While part of the fun of a Thanksgiving theme is over-the-top food (marshmallows in main course and all that), the dish I cooked that I’m going to keep in the repertoire is this fantastic stuffing that I found at Allrecipes.com. Below is my slightly modified version of it.

Ingredients

100g butter
1/4 cup Dijon (French) mustard
1 large onion
2 sticks celery (enough to make ~1 cup when chopped)
110g sliced water chestnuts (e.g. from a can)
1/2 cup crumbed walnuts
1/2 teaspoon dried thyme
salt and pepper
3 cups dried bread crumbs (~300g)
200mL of chicken stock

Method

Finely chop the onion and celery.

Melt the butter and mustard together in a large saucepan, and when combined, add the onion and celery.

Cook until onion is softened, then stir in water chestnuts, walnuts, thyme, and pepper & salt to taste.

Mix in the breadcrumbs until thoroughly combined.

You can pause at this point if you wish, and place the mix in an airtight container in the fridge overnight. This enables you to make this part in advance. The last stage can be combined with removing a turkey from the oven to rest.

Heat oven to 180 degrees Celsius.

Add chicken stock to the mixture and stir through. It will begin clumping together.

Spread on a baking tray and cook in oven for 20 – 30 mins, until crust begins to dry. Then, remove from oven and serve.

Makes approx 1.5L or enough for 10 adults.

Microwave Popcorn Recipe

Modern conveniences are great.

Back in the early 80s, there were all sorts of new electronic appliances coming onto the market. My parents asked my brothers and I whether we would prefer a Video Cassette Recorder or a Microwave Oven. Both promised to revolutionise our lives!

We all voted for the VCR. We ended up with the microwave.

Oh well. It wasn’t all bad. We made a lot of microwave cakes. It was amazing – you were 10 minutes to cake at any point in the day.

We worked our way through the microwave cookbook. It turned out that all sorts of things could be baked until they were moist and floppy.

Unfortunately, you can maintain the excitement only so long of cooking stuff in a metal box with a spinning glass dish. These days our microwave is relegated to defrosting, melting and reheating. No actual cooking.

Well, there is one counter-example: microwave popcorn.

Think of all the technology that goes into that special plastic bag, bought from the supermarket, placed into a microwave, and zapped until fluffy popcorn appears. How did they ever make it before? Turns out that it was pretty simple.

And in fact, according to this great article I found on the interwebs, it can still be simple, and yet still use a microwave.

I was so excited by this discovery that I immediately posted it on Facebook, but since all my important recipes have to live on my blog, I’m reposting it here.

And for those who were concerned – the next year we got the VCR.

Ingredients

1/4 cup of ordinary popping corn

salt

Method

Place the popping corn into a sealed microwave safe container, e.g. microwave rice cooker, paper bag folded shut, etc.

Microwave on High in an 850W oven for 2:15 mins. Remove, tip into a bowl, and sprinkle with salt.

Serves 2.

Okay.. a little word of warning. There are trade-offs between the following parameters: wattage of your oven, the amount of popping corn used, size of the cooking container, amount of corn that burns, amount of corn left unpopped. The first time you do this, keep a careful eye (and vigilant nose) on what is going on so that you can hit Stop if anything starts burning. I have erred on the side of unpopped kernels rather than burnt popcorn, but perhaps I could improve this with further experimentation.

Sugar-plum Tower Recipe

For our recipe club this month, the theme is “story”, which means that all recipes needed to have some sort of associated story. After struggling to come up with something, my friend Josie suggested the story of the Sugar-plum Fairy (who rules the Kingdom of Sweets in Tchaikovsky’s The Nutcracker), which sounded great because I’d never come across a sugar-plum before.

It turns out that the “plum” in sugar-plum is the same as the “plum” in plum pudding, i.e. not a plum at all. While there appear to be alternative views on the Internet regarding what the historical sugar-plum consisted of, the common themes appear to be the use of dried fruit, the shape of a ball, and being covered in sugar.

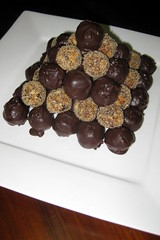
So, despite basing my recipe here on a sugar-plums recipe that is referenced from Wikipedia (can you get more credible than that?) by Alton Brown. I have diverted somewhat from tradition by coating two thirds of the balls in chocolate rather than sugar. Not only does it taste great, but gives a nice layered effect.

Ingredients

1/4 teaspoon (1.25mL) anise seeds or 1 star anise
1/4 teaspoon fennel seeds
1/4 teaspoon caraway seeds
180g slivered almonds
1/4 teaspoon ground cardamom
pinch of salt
1/4 cup (62.5mL) icing sugar
120g dried plums (prunes)
120g dried apricots
120g dried figs
1/4 cup of honey
1 cup (250mL) raw sugar
250g dark chocolate

Method

Toast the anise, fennel and caraway seeds, e.g. under a grill. Toast the slivered almonds as well, but don’t mix them with the spices yet.

Grind up the spices, combine with the cardamom and salt in a small mixing bowl. Sift in the icing sugar, mix well and set aside.

Place the almonds in a large mixing bowl, and crush, e.g. with the end of a rolling pin, so that they are smaller pieces.

Very finely dice the prunes, apricots and figs, and add to the almonds. Mix together with a butter knife until it looks something like high-end trail mix.

Add in the spiced sugar to the fruit and nut mix, and ensure that it is well mixed through. Then pour in the honey and stir until well combined and the mixture is forming clumps.

Roll scoops of the mix between clean hands to form small balls no more than 1 inch in diameter. I needed to clean my hands several times throughout this process, since sticky hands would prevent the balls forming nicely.

Place each ball onto a wire rack and leave uncovered until all balls are made. You need to make at least 55 balls to make a tower 5 layers high (and you’ll need 91 balls to make one with 6 layers, but you probably won’t be able to make that many with these quantities).

Take the smallest 35 balls (and maybe a few more, but ensure you leave at least 20 balls) and set them aside for coating with the chocolate.

Melt the chocolate, e.g. in the microwave by zapping for a minute then stirring, and repeating until the chocolate is just runny. Put some foil down, then roll the balls in chocolate one by one, putting onto the foil to set. If the chocolate starts going hard, melt it again and keep going.

You can pause at this point. In fact, the balls should keep for up to a week if left on the rack, or longer if kept in an airtight container.

Just before serving, put the raw sugar in a bowl, and roll each of the remaining (non chocolate covered) balls in the sugar to coat them well.

To make the tower, form a base of 5 by 5 chocolate balls, each touching its neighbours. Then place a layer of 4 by 4 sugar balls on top. Then a 3 by 3 layer of chocolate balls, then a layer of sugared balls, and a chocolate ball on the top.

This recipe makes between 65-75 balls, where an adult would probably eat about 5 balls at a sitting. Serve with good coffee.